On the latest episode of Epicurious' 4 Levels series, Art of Cake Decorating Chef-Instructor Penny Stankiewicz demonstrates elevating birthday cake by piping buttercream flowers and baking candy inside for the ultimate surprise.
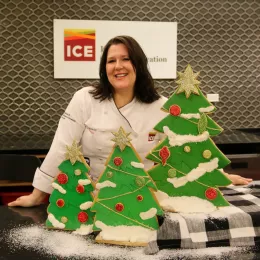
Chef Penny has more than 15 years of professional pastry experience. After graduating from the Institute of Culinary Education and working at Spice Market, she opened custom cake bakery Sugar Couture in 2004 and has taught cake decorating since 2014.
For Epicurious' birthday cake episode, she uses a white cake, vanilla and chocolate icing, colored buttercream flowers and edible glitter — plus assorted sprinkles inside.
Watch her demonstrate cake decorating in the video and get each recipe below.
Explore the Art of Cake Decorating at ICE's New York campus.
Happy Birthday Cake
Yields 1 8-inch cake
White Cake
Ingredients
- 230 grams egg whites
- 420 grams whole milk
- 20 grams vanilla bean paste
- 255 grams cake flour
- 255 grams all-purpose flour
- 540 grams white sugar
- 23 grams baking powder
- 2 teaspoons salt
- 319 grams butter
Directions
- Combine egg whites, milk and vanilla bean paste. Mix to incorporate.
- Combine both flours sugar, baking powder and salt in the bowl of the kitchen aid mixer. Place on the mixer with the paddle attachment and mix to combine.
- Add butter that is very soft, but still in solid form, in pieces in mixer with half of the milk mixture. Mix on medium speed until moist and no traces of butter remain.
- Mix additional 2 minutes to develop texture. Add the remaining milk mixture. After it's combined, mix on medium-low for another 2 minutes.
- Prepare four 8-inch-by-3-inch pans with pan spray and parchment. Add 3/4 inch of batter to each pan.
- Bake in a standard 350 F oven or 300 F for convection until the top springs back when you touch it and it doesn’t feel wet inside, between 20-25 minutes.
Vanilla and Chocolate Icing
Ingredients
- 634 grams confectioners sugar
- 140 grams pasteurized egg white
- 935 grams butter, softened
- 3 grams salt
- 20 grams vanilla bean paste
- 160 grams 72% (very dark), Cluizel preferred
Directions
- In a clean mixing bowl, combine confectioners sugar and egg whites. Whip on medium-low speed until a thick royal icing is created.
- Add softened butter in cubes, mixing until icing no longer appears broken.
- Add salt and vanilla.
- Stir in cooled melted chocolate if making the chocolate version.
- Separate icing in half and add melted chocolate to one half.
Assembly
- 1 pintt simple syrup
- 1 cup St Germain
- 1 pound sprinkles
- 4 ounces edible glitter, white or clear
- Using ring cutters, cut a circle from the center of three of the cakes.
- Place one down on the cake board. Soak with St Germain syrup and pipe chocolate icing on top.
- Smooth with an offset spatula.
- Repeat this process with the other two cakes with holes punched out.
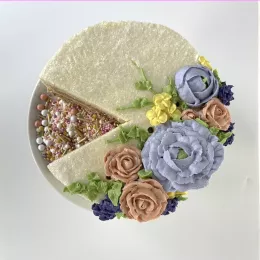
- Fill the center of the cake with sprinkles.
- Top with the final uncut layer.
- Apply a thin coating of icing as the crumb coat. Chill in the freezer for 15 minutes or in the refrigerator for 20 minutes.
- Apply a second, thicker coating of icing.
- Place glitter in a large bowl. Holding the cake in your nondominant hand, use your dominant hand to stroke the glitter onto the surface of the cake.
- Place the cake on your final presentation board with a dollop of icing to glue.
Decorators Buttercream
Ingredients
- 16 ounces butter
- 8 ounces shortening
- 1 teaspoon salt
- 48 ounces 10x
- 3 tablespoons meringue powder
- 4 1/2 fluid ounces milk
Directions
- Beat the butter and shortening with a paddle attachment to combine fully. There may still be a few small shortening lumps but they should be very small. Lower the speed add the meringue powder, salt and sugar. Beat until fully combined.
- Gradually add milk. Turn mixer to medium and beat until light and fluffy, about 6 minutes.
Buttercream Flowers
Directions
Extra buttercream will be needed to create the flowers. A half batch of the original recipe will be enough. Keep the buttercream cool but soft enough — too soft and the flowers won’t hold their shape, too firm and it will stick in the tip.
To color the buttercream, separate it into as many small bowls as you would like colors, having about a cup of icing in each bowl. I suggest one main color, two or three contrasting colors, and one green. Using gel paste food colors, preferably on the tip of a toothpick, add very small amounts and stir until the correct color is achieved and no streaks remain. Allow the icing to sit if you can before working with it, as the color will continue to develop. I used a rosy pink, lavender yellow and purple, along with an avocado green. The buttercream is slightly tinted yellow because of the butter added, so it will warm your colors some.
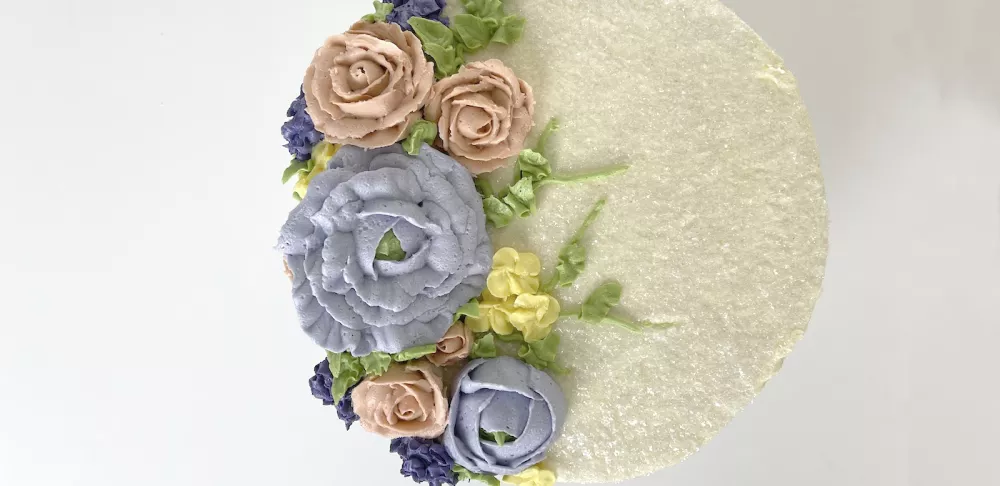
Piping buttercream flowers is a skill that requires practice. For this cake, I piped roses, peonies, small yellow four blossom flowers and wisteria. I used 13-inch piping bags, with plastic couplers and rose tips of various sizes, from 102 to 104, and one large tip, a 128, with no coupler. Pipe the flowers onto a nail with a piece of parchment, and then chill the flowers to make it easy to place them. If they warm up too much while you’re working, pop them back in the refrigerator or freezer. The smaller ones will get soft very quickly so work fast. If piping flowers is a bit too challenging, try piping rosettes of various sizes and colors in similar ways and using those to create a flower-like feeling.
Start by piping vines on the cake, where you think they will look nice. Use a small round tip or a tipless piping bag cutting only a small hole. To place the flowers, pipe a mound of icing, about 3 inches long, by about 1/2 inch high along one side of the cake, about three-quarters of an inch in from the edge. Place the largest most dominant flowers first and then fill the remaining areas with your smaller ones, working to keep a variance in color. Pipe the wisteria-type flower directly onto the cake, using the smallest rose tip. Save the small filler flowers for last, and use them to fill any spots that look empty. Finally, using a leaf tip of your choice, pipe leaves to fill in any raw spaces, to add contrasting green where it needs the color, and to add a bit more dimension.