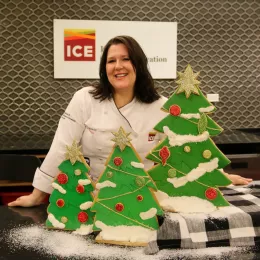
In my cake decorating and sugar art business, Sugar Couture, one policy that has not changed since the beginning is a requirement that all my work is custom. That provides an exciting opportunity to find creative ways to make things happen for each client, like a custom chocolate mold.
If a bride wants the lace from her veil to be replicated on her wedding cake, or I find a gorgeous trinket at an antique market that would be a perfect adornment for a cake, I have to find ways of bringing those details to life.
Standing out in a crowded field means that I have to bring something to the table that other designers don’t. Making custom molds for uses in all formats are one of the ways I can make gorgeous and unique pieces that will only be found in my work. I was doing this long before there were so many commercially available molds.
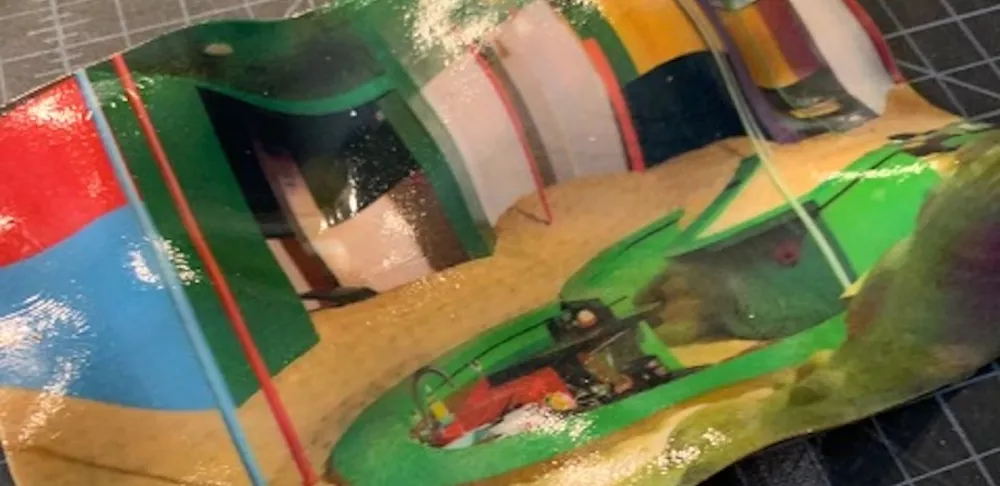
I love the challenge of figuring things out. What parts connect on a motorcycle’s engine? How is a dress constructed? The ability to break things down and replicate them is the true job of a sugar artist. A unique project I was tasked with recently: a chocolate bar created from a 3D-printed wavy art piece. The client had only one of these pieces.
I have many tricks to make food-safe molds, and I make choices of which to use based on the needs of the piece. Is it large? Does it have a lot of detail? Lots of undercuts? Do I need one or many? Will this mold be used in high volume or just once? How much time do I have to create the piece?
The original was very thin, undulating and rather large, about 4x7 inches. I needed only one chocolate piece for a specialty gift for a very discerning recipient. I chose to use a molding product for this that I could melt and pour over the prepared piece. It would set quickly, and since I only needed it once, I can remelt the material and make another mold.
Prep was the most important step here. It's best if the materials I use to make a mold are not used for any other purpose. Here are the items I use:
- Original piece to mold.
- Thin plastic cutting board or another non-silicone base that I won’t use for anything else.
- Depending on the size of the positive, a container that it fits in with only about a half-inch of space all around or L-brackets (metal or plastic) with binder clips or clamps.
- Petroleum jelly.
- Hairdryer or heat gun.
- Pot or microwave-safe bowl.
- Mixing spoon.
- Modeling clay.
- Mold-making material, in this case ComposiMold, which is reusable.
If the piece I want to make will fit in, say, a pint container with space all the way around it, I'll use something like that to make the mold. If you're making your own mold, look around and see what you have that you are ok parting with. If you plan on making many molds over time, investing in mold box L brackets is the way to go. This gives you the flexibility to make a mold any size you need.
I prepare the base for the mold first. I've been using an inexpensive laminated shelf as the base, and a flexible cutting mat works great. Keep in mind some items may be damaged through this process. Many won’t, but if you’re planning on using something that is special or expensive to mold, you may want to consider that it can be damaged in the process.

I clean and dry the item well. In my case, the undulating card required something to support it underneath and to keep the mold-making material from going under the item. I kneaded clay, formed it into logs, and pressed it firmly underneath the piece to secure it and make sure it was well connected with no air gaps. The clay was about 1/3 inch thick in the lowest places. I pressed the clay to the shelf, and with a knife, trimmed off any excess clay so it was straight-sided. This will be the sides of my chocolate mold later.
I then rubbed a small amount of petroleum jelly all over the surface of the plaque. Some items come out of molds perfectly and some struggle. The jelly helps the item release from the mold later. I always use it because if it doesn’t come out, I’ve wasted time and product. Silicone isn’t reusable, so it can be very costly to make mistakes. Take caution and use only as much petroleum jelly as needed. Too much can stop silicone from curing. Using a hairdryer or heat gun, gently heat the surface that has the jelly applied to get it into all the crevices, and then using a clean paper towel, remove any excess, leaving only a very thin coat. This step is most important for items with a lot of small detail.
 Using L-brackets, I formed a box around the piece, with about a half-inch around it. Then, I rolled more thin logs of clay and secured them around the outside of the brackets on the board, pressing firmly to make the edges where they meet the board as air-tight as possible. This is security against the thin mold-making materials seeping out from underneath before it's had the chance to set.
My piece is ready to go. If you use a smaller piece and you are going to try the pint container or some other kind of container you have on hand, you only need to secure the positive to the bottom. You can use clay, like I do, or there are products you can buy to anchor it to the base and the petroleum jelly can work, too. If you don’t need the piece again, you can use cool temperature hot glue, but the item has to be secured. If it isn’t, when the liquid material pours over, the piece will move and float, and the mold will not work.
Once the piece is completely ready, I can prepare the material. ComposiMold material can be melted in a pot on a stove or in the microwave. I heat it slowly over medium-low heat until no lumps remain. For this product, heating should be done in a well-ventilated area. I stir while it's heating but not too much. Over-stirring can add air bubbles that will ruin the final mold.
I like to get on a step stool to pour. The extra height gives me an advantage. I pour from a height in a very thin stream. The thin stream, with the help of gravity, will help pull out any bubbles that may have been incorporated during heating. I pour into a corner of the prepared mold box without moving around. When I stay in one place and pour slowly, the material fills all available areas efficiently. I pour enough material to have at least 1/4 inch on top of the piece. For my undulating piece, I needed much more material to get all areas covered and then have an even level on top.
I allow this to cool and set. The beauty of this product is that I have the mold very fast. It's not material that will last a long time, so if you’re planning on making a mold that will be used over and over, this is not the product to use. But for quick turnaround, lots of detail and a product that can be remelted and used again, this is a great option.
Once the mold is set, I remove the mold box or cut away the plastic container. Turning it upside down, I remove the clay and carefully peel back the mold, away from my positive. I wash it gently in soap and water, let it air dry or use the hairdryer to help. As this material is sensitive to heat, I don’t want to use too much here. Chocolate is fine, caramel is not. Towels or paper towels can leave debris that can get into the final product so air drying is best. I keep the clay, which can be reused.
 Now the mold is ready to use for tempered chocolate, fondant, gum paste or modeling chocolate. My final piece is poured dark chocolate, freeze-dried raspberries, airbrushed raspberry color and hand-painted dots to meet the client's brief.
Having tricks like this in your toolbox means you can create whatever fantastical ideas you have and reproduce things that would otherwise be impossible with standard methods. Stand out from the competition by creating truly unique pieces that only you bring to life.
Study sugar art with Chef Penny in The Art of Cake Decorating at ICE.