I recently chanced upon the work of artist Kara Walker, titled “A Subtlety Or the Marvelous Sugar Baby”. The mammoth sphinx structure, installed in the old Domino Sugar Refinery in Williamsburg, was 35 feet high and took about four tons of sugar to create. She described it as a “homage to the unpaid and overworked artisans who have refined our sweet tastes from the cane fields to the kitchens of the new world.”
The use of sugar sculptures as a form of creative expression and political dialogue ages back many centuries. Sidney Mintz, in Sweetness and Power, describes the medieval fashioning of sugar, called subtleties. These sugar sculptures depicted political or religious scenes and commonly appeared on the tables of the wealthy.
Though there may be little that is “subtle” about them—then as now—sugar sculptures still hold a prized place among the pastry arts, decorating luxurious banquet halls and being featured in culinary competitions. Today, artistic showpieces consisting of sugar and its derivatives are constructed using a variety of mechanical methods.
These methods include—but are not limited to—casting, blowing, pulling, pressing and spinning. And while this post is titled “The Art of Sugar Sculpting,” let me assure you that sugar sculpting is as much a science as it is an art.

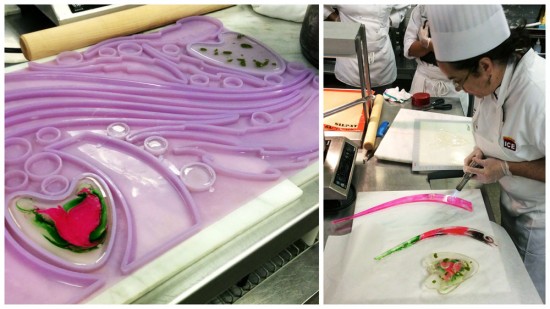
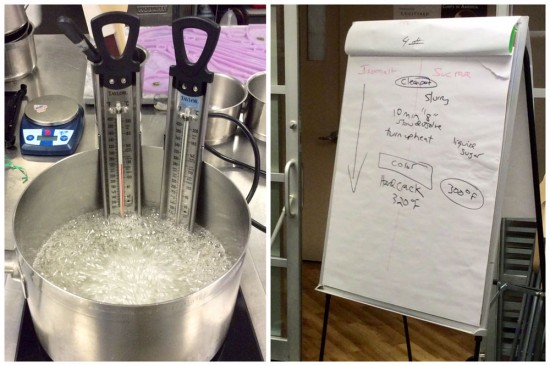
In one of our recent classes with Chef Kathryn Gordon, we were introduced to the basics of casting—the tip of the sugar sculpting iceberg. The idea is pretty simple: cook sugar to the hard crack stage (about 320 degrees Fahrenheit), color it, cast it in silicone molds of desired shapes and assemble the structure together.
Yet despite these straightforward instructions, there are plenty of tiny problems that can occur over the course of this transformation. For starters, sugar has a tendency to crystallize. If your pots and equipment aren’t perfectly cleaned, chances are the sugar will crystallize before you reach the hard crack stage.
It is also easy to overcook or burn sugar, and thus it is critical to use accurate and well-calibrated thermometers. Visual cues such as the size and frequency of popping bubbles will also help determine when the sugar is ready, as well as conducting “water tests.”

In our class, we used isomalt, a sugar derivative, instead of sucrose (what we imagine when we think of “sugar”) for the sculptures. Isomalt, while more expensive than sugar, is readily available in any pastry supply store. It is the preferred choice for professional sugar sculptors because it naturally resists crystallization and is less hygroscopic (does not absorb moisture as readily) than sucrose.
It also does not exhibit the typical yellow/caramel color of cooked sucrose which allows it to be colored more easily and accurately. No matter what sugar derivative you choose, it is an essential first step in the sculpting process, one that will dramatically influence your plans to create a visually appealing and structurally stable design.

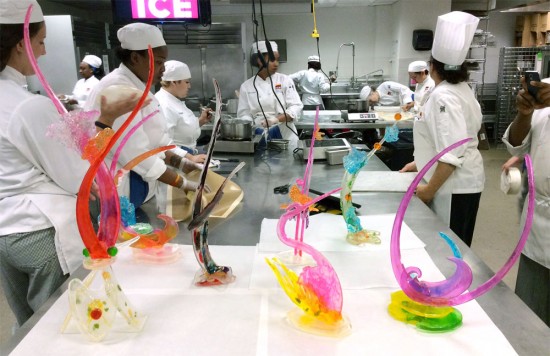
Once we got to work on designing our sugar sculptures, it was exciting to see how a group that started with the same ingredients ended with such a diverse mix of colors, shapes and designs. It was a project that urged us to explore our creative side as pastry cooks, as opposed to following recipes and baking by the book. In a sense, the process was a perfect metaphor for the life of a pastry chef—educating our inner scientists in order to reveal our inner artists.
For more behind-the-scenes posts on life as a pastry student, click here.


