In New York, the bagel capital of the world, it’s only proper that the No. 1 Ranked Culinary School in America offers an exclusive course in bagel making. Here's what I learned.
With a mission to learn the art of making the city’s favorite breakfast food, I signed up for a course in bagels, pretzels and bialys. The class, a mix of culinary students and recreational bakers like myself, was led by ICE’s dean of bread baking and Balthazar’s founding bread baker, Sim Cass.
The London native has been deemed the “prince of darkness” for his role in introducing dark-crusted sourdough to this side of the pond. He has a passion for dough and an encyclopedic knowledge of all things leavened. One class with Chef Sim will quash your fear of homemade bagel-making.
While mixing, rolling, boiling and baking, I picked up some nuggets of bagel-making wisdom. Here are my top preparation tips for the next time you’re at home and looking for the perfect vehicle for your cream cheese and lox.
1. Moisture: Wetter dough means crispier bagels. Contrary to what you’d expect, the higher the water content in your dough, the crispier your bagel. In the end, it’s a matter of preference, so don’t be afraid to tweak to your liking. Though the recipe we used called for 62.4% hydration, we lowered it to 60% in order to make chewier, less crispy bagels (that is, 540 grams of water, rather than 570 grams).
2. Water temp: The colder the better. Due to the time constraints (four hours to get through bagels, pretzels and bialys) we used lukewarm water to mix our bagel dough. This activates the yeast faster. Ideally, though, your water should be cold. If you have a couple hours to let your dough rest and rise, use cold water. And if later in the process, your dough is misbehaving (i.e., you’re having trouble kneading or shaping it), refrigerate it briefly and try again.
3. Dry active yeast: Let it chill. Those tiny granules of yeast are going to have to do a lot of work; without them, your bagels would be mere bagel chips. Be kind to your yeast, and give it a moment to rest once you add it to the water. Resist the urge to vigorously whisk the yeast, instead letting it sit on the water's surface for three minutes to start its yeasty magic before moving on to the next step.
More Bread Reading: Testing the Tangzhong Bread Method
4. Flour: Embrace the gluten. Let’s step back for a moment. You’re eating a bagel. Is it really the time to start cutting back on gluten by using whole-wheat flour? But seriously, your bagel dough is going to be pulled and stretched and rolled and boiled — it needs lots of gluten for elasticity. According to Chef Sim, even so-called “whole-wheat” bagels have just a small percentage of whole-wheat flour. (Side note: when it comes to bread, Chef Sim is a rye purist himself. This class made me reconsider my own affection for whole wheat.) So unless you have a serious intolerance, just commit to having a bagel with full-gluten flour. (We used about 87% high-gluten flour and 13% all-purpose flour.)
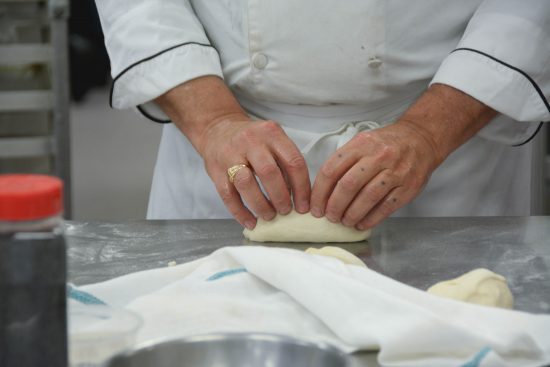
5. Mixing: Low and slow is the way to go. To achieve the smooth, stretchy texture required for bagel shaping, mix your dough using an electric mixer with a hook attachment at low speed. Think: 3 and 3. Three minutes of mixing on the lowest speed then three minutes on the second-to-lowest speed.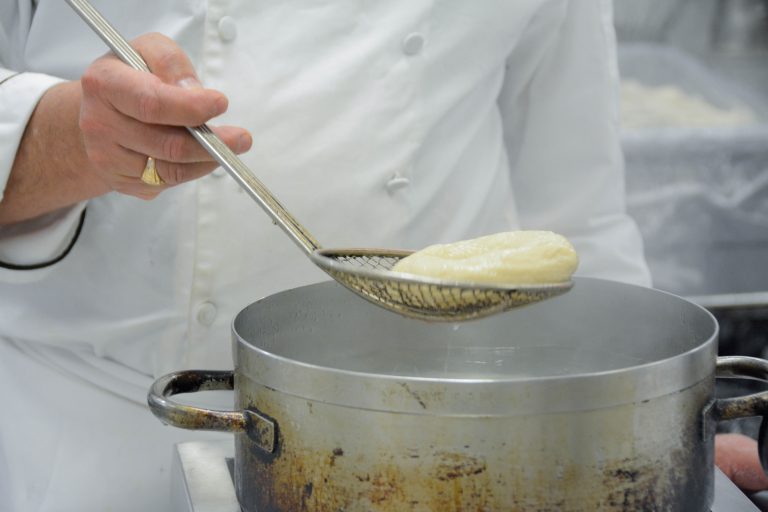
6. The rise: Your kitchen climate is A-okay. According to Chef Sim, there’s no need to fret about the warmth or coolness of your kitchen. Nor do you need a special, warmed proofing box to accelerate the rise of your dough. Unless you leave the dough in your garden in the snow (Chef’s words, not mine), it’s going to rise.
7. Flavor kick: After the proof. Once your dough has had the chance to “proof” (the baker’s term for the final rise before dough shaping), it’s time to add flavors that will be baked into the bagel, if any: cinnamon-raisin, blueberry, honey, sun-dried tomato, anchovies. Just make sure that if you’re adding something oily, like sun-dried tomatoes, you pat them dry to soak off excess oil.
8. Shaping: Think empanadas. Here’s the breakdown of shaping your bagel. Measure 4 ounces of dough and form it into a flat rectangle (here is where you would fold in your flavorings, if any). Then, fold the dough into an empanada shape, pinching around the edges. With generously floured hands, roll your dough to about 10 ½ inches with thin ends (like a snake). Dab cold water on one end and connect to the other to make a circle. Then roll that part to create a sealed seam.
9. Spa treatment: A brief boil, then an egg wash. The boiling before baking step is crucial to get that firm, crisp crust and a chewy interior. Using a spider or spatula, gently place your bagels in simmering water (not a rolling boil) for twenty seconds and remove to a lightly oiled sheet pan. Using a brush, treat your boiled bagels to a luxurious egg white wash to ensure that shiny crust.
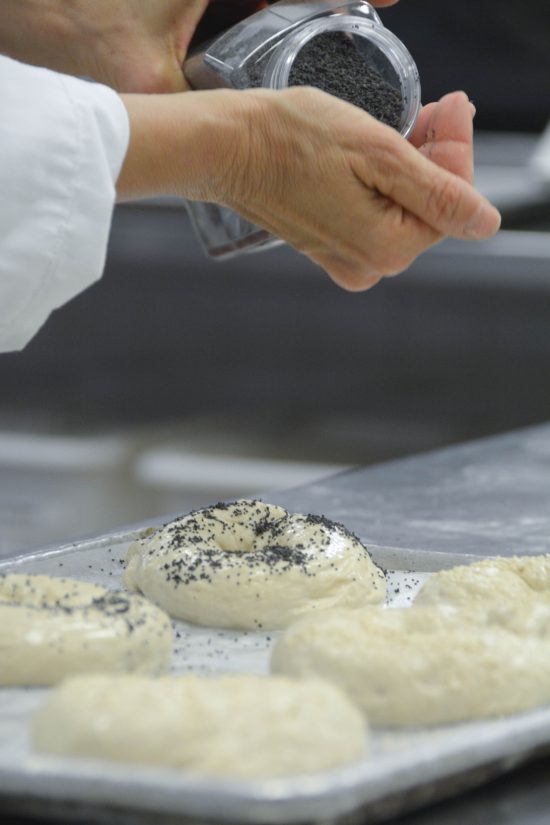
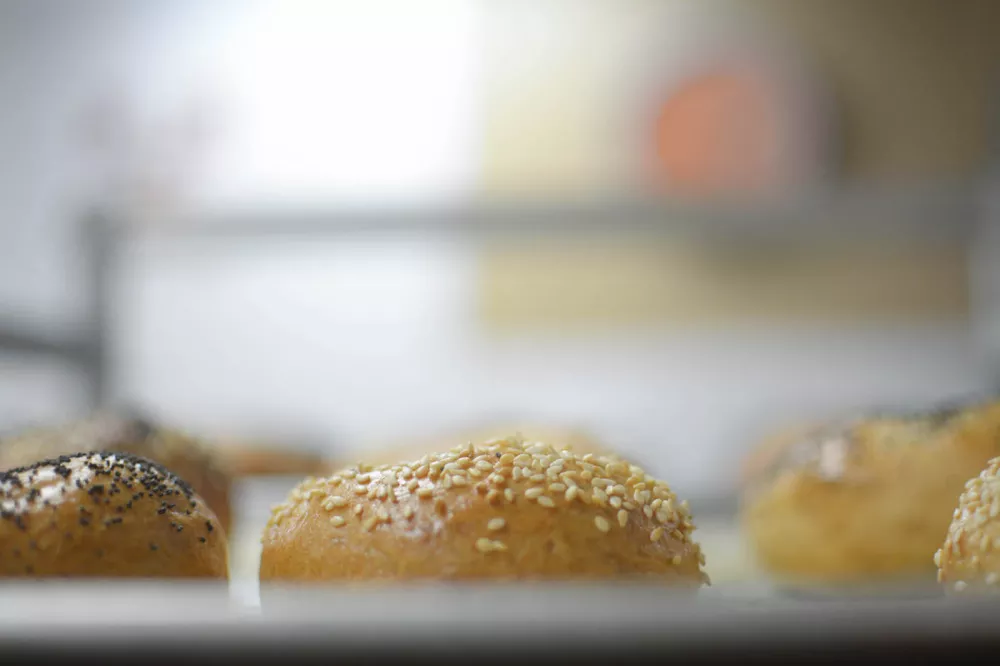
10. Toppings: You rule. The beautiful thing about making your own bagels is the freedom to add whichever toppings you want. I am in LOVE with everything bagels. I am NOT in love, however, with caraway seeds, and I wasted countless hours of my childhood flicking every last caraway seed off my everything bagels with cream cheese and butter (don’t judge). When you make your own bagels, you lord over your toppings with no restrictions. Salt bagel with toasted garlic? Go for it. Poppy, pumpkin and sesame seeds? Why not! You’ve done all the hard work — now it’s time to have fun.
Place your bagels into a convection oven preheated to 375 F (or 400 F if using a non-convection oven), bake for 20 minutes and get ready to schmear your heart out.
Bake bread with hands-on instruction in Artisan Bread Baking or Pastry & Baking Arts.